
Dated: 5:57am on Monday 10th June 2019
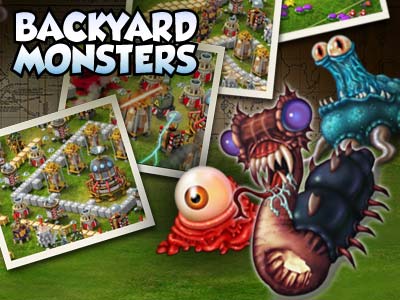
Strategy To Play Backyard Monster For All Chapters.
|
Index Chapter 1: The Noob Stage
You have come far, you have learned the ways of designing a decent base, mastered the art of the kozu farming and now you are ready fo the true challenge…WM.
Chapter 6: The Secret art of Kozu Farming
Chapter 7: Links Helpful links to other guides,funny forms ect.
Chapter 1: The Noob Stage This chapter will tell you:
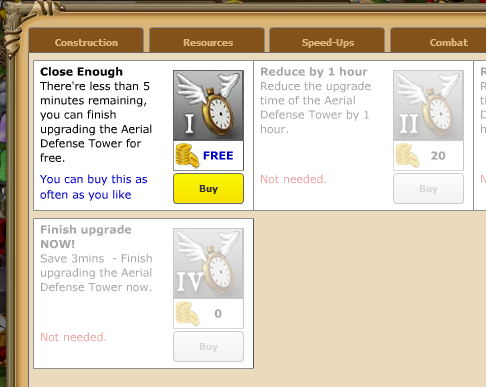
When you start the game and the tutorial, you are awarded 1000 Shiny. These are mostly the only Shiny you will ever get unless you chose to buy some. Therefore, these shiny should be spent wisely. You always have mushrooms, but they won’t always award Shiny, and most from one mushroom is 8, while sometimes you get 3. Your workers would have to be free at hand to be used to pick mushrooms. I would recommend after buying the second worker which you are told to do, you should also buy the third for 500 Shiny. Believe me, it’s worth it. Either that, or all the 5 yard expands. This will make your yardage huge and you will have tons, and tons of space to work on and improve your yard in all ways you could possibly think of. Under the tutorial, you are told to spend some Shiny to speed up upgrades, but you do not need to. You can save over 25 Shiny if you just wait until the timer’s are done (or down to 5 minutes for a free speed up). After the tutorial, you start building your yard. When reaching a higher level, you will realize your yard is too small to build anything on, or to remodel. That’s why you should use your remaining Shiny on 2 yard expands, and pick mushrooms until you get the 3rd.
You can also buy the Capasity Upgrade, but that’s never needed. It will give you 10% extra resource capasity until you’ve bought it
Never use any of your Shiny on Speed Ups. That’s not needed if you bought the 3rd worker.
If you however decide to buy some Shiny, the most recommended is to buy the 4th and probably the 5th, regardless of their price. They are always worth it. When you have one worker, one upgrade take 100% of your worker-power. When having two workers, one upgrade takes 50% of your worker-power. When having three workers, one upgrade takes 33.33% worker-power. When having four workers, one upgrade takes 25% worker-power and when having 5 workers one upgrade takes 20% worker-power, allowing you to have almost double as many upgrades going at once than if you only had 3 workers, making it way more worth it than spending the Shiny on speed-ups.
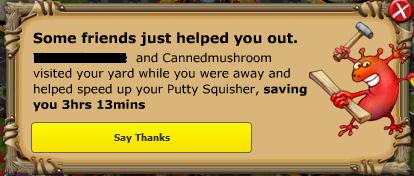
This is where the tutorial starts for everyone: Follow each steps, and you’ll learn the basics of attacking, defending and upgrading. Remember to be nice in the chat rooms to make friends who will shorten your upgrade. When someone helps your upgrade(s), this message will pop up: As you can see, if saved me a bunch of time.
Chapter 2: The Noobish-Amateur Stage
Ok you have the pokey (of course) and you have spent you shiny on the third worker and yard expansions, time to learn the basics:
Click on one Resource gather and press Bank All, now you have tons of res and can build again, start upgrading your Townhall now.
and click on “Attack” on one of the NPC’s Picture, Preferably the Kozu, Legoniaririe or Abunakkais and use your pokeys to try and destroy their TownHall, Watch out for Mines! they are invisible 6.Now that you have destroyed their TH, yay :) go back to your base and click on the
“Quests” Button:
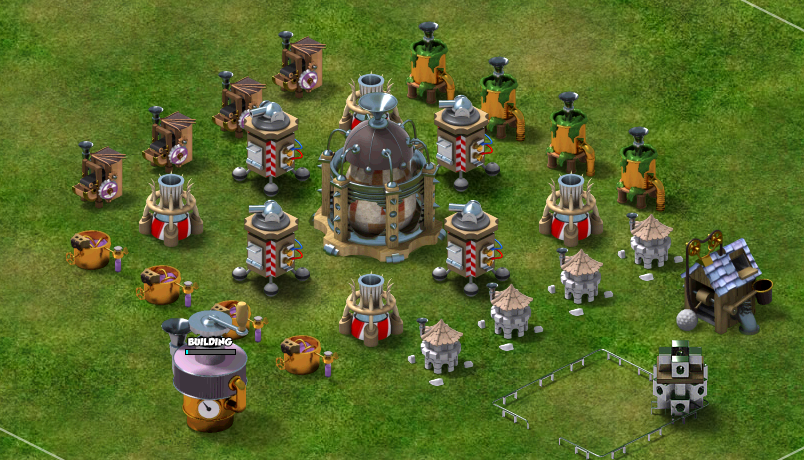
Chapter 3: Surviving the Player Onslaught Ok you have Gotten out of your starter protection now, you now have to watch out for enemies, since now people can attack you, start by building All of the possible towers you can, then slowly one by one upgrade them to atleast level 2, your base doesn’t have to be very good at this level, just make sure you build all of your towers and you should be fine, here is a decent base: Please Note: The Giant Egg in the center symbolizes your Town Hall level, I do not know what level your If you are really having trouble making a base or want to make your own Original Base Follow these guidelines: Basic Idea Summary:
SUPER IMPORTANT NOTE: The enemy can spawn troops inside of the White Box so putting your Town Hall in one corner is a horrible idea
Chapter 4: Getting your Champion
This chapter will tell you: After Chapter 3, you should be able to build your Champion Cage soon. It will cost 500,000 of both twigs and pebbles, and only 250,000 putty which should be no problem after 7 days. This defence is critical to get as quick as possible. Keep in mind that your champion never dies unless juiced, and after you’ve used him, he’ll come back to your yard!
As I said, your champion never dies unless juiced. If it starves, one feed you have fed it for its current level will reset. E.g. you have fed it 5 times and need 9, and it starves, you will need to feed it 5 times instead of 4 times again. It will take one day to build. Each friend helping your build is nice, as it cuts of ~5% of the timer. Getting your Champion is free, and you recieve no goo from juicing it. There are three different Champions to train, so now it’s time to:
Fomor the Fearless (monster in the middle): Starts flying at level 3 and buffs all your monsters. This is a game changer since it acts like permanent putty rage (Putty Rage is when you catapult putty at your monsters to make them faster and take less damage). Each level increases the buff by 10%! Fomors damage is low, but he has range and shoots 5 balls each second (He is also the only champion that is pokey bomb-proof) Fomor will attack anything that the group he is following is attacking! Make him go with Ichis, and he’ll take out defensive towers. Best for endgame Gorgo the Great (gorilla to the left): He is a defence monster, starting out with 40,000 hit points, and having 200,000 hit points in level 6. He is a pain to take out for the attackers of your yard because of the high amount of HP and his decent damage, however, a crab with some few support monsters and two level 5 Zafreeti’s could take him down. He can tank a whole yard. Gorgo will take his own path and attack mainly Silos, Resource Gatherer’s/Harvesters, Defensive towers and the Town Hall! Best for the early stages Drull the Destroyer (two-headed dragon the the right): He is an offence monster, with a great amount of damage, having 3000 damage in his first stage (1), just as much as a level 6 Gorgo. He is a fast champion with a decent amount of health, however a large pokey bomb would kill him because he can’t take out several monsters at the time so his damage is wasted. He can take out every monster with one hit in level 6, except from a trained Dave. Same as Gorgo, just that it’s hard for other monsters to keep up and support him because of his great damage and great speed.
Decent overall
If you want to change your champion, you can juice him! You champion can’t die, even if he lose all his HP. He will just retreat, and will automaticly heal over time. If you have just made a Champion, and are progressing to get Kozu tribe to level 6 (chapter 6), you can juice your champion when he is low on health, then remake him to have full HP, making you able to re-use it all the time, so it’s easy to solo tribes with only him. Note: Requires Monster Juicer.
Conclusion: Get your champion monster as soon as possible. The champions put a new aspect to the game, and you cannot play without one. Try and stick with one, and think before deciding. Chapter 5: Bored…going from peace to the chaotic WM
First of all, make sure you aren’t a noob and that you have atleast Town Hall 6, which are required to upgrade your Map Room, a high level flinger and catapult (level 3 or 4) since the number of hexes you can fling corresponds to the level of your flinger/catapult (for info look at Icey Rulez’s guide below) and also make sure that you have not had a attacker successfully destroy your TownHall in a long time since most people that attack other players (since kozu farming gives so much more) on map one are noobs and if you can be beaten then a noob well then…you are a noob. The way things work in WM is ALOT more different from how things work in map 1. So let me lay it out to yall : 1) The WM is divided up into “hexes”. Each hex counts as 1 yard. Any hex unoccupied by a player or outpost will be filled with a wild monster tribe or an empty kex that will say “Reserved” to the left if you hover over it, just ignore these ones, here is a look at a WM screenie: 2) To make an outpost, you must destroy a wild monster tribe’s outpost and it gives you the option of taking over. It costs 2mil per resource per outpost, and after you get 5 outposts, each consecutive outpost will cost 2mil+, so 6th – 4mil, 7th – 6mil, etc. After you establish the outpost, you have a choice to build a starter kit on it. IT ISHIGHLY RECOMMENDED THAT YOU BUILD A LARGE STARTER KIT ON ALL UTPOSTS (until you can afford mega). Do not worry if you can’t afford to build the starter kit right away – you can always come back later and build it, Warning!– any buildings that you have on the outpost will be replaced if you build a starter kit or any other kit! 3) Level doesn’t matter in WM. A level 44 can attack you even though you are level 31. However, what DOES matter is range. Every yard (including outpost) has a certain range. Everything in that range of the yard can be attacked by that particular yard. Range is based off the level of your flinger and catapult (with max being level 4). 1 level = +1 hex range. HOWEVER, the flinger and catapult have separate ranges. This means that if your flinger is lv 4 and your catapult is lv 3, you can fling monsters at a tribe 4 hexes away, BUT you can’t catapult it. 4) Lastly, and probably the most important, are farms. In WM, All Kozus and Dreadnauts are recommended farms(for Dreadnaut you should consider only attacking the higher level ones). Because of this, DO NOT BUILD OUTPOSTS ON AFARM. Doing so will piss off other people and make them attack you to get revenge. Building an outpost on a farm permanently erases it and even if you do recycle your outpost, the wild monster tribe that takes its place is completely random. Also important is the fact that you CAN kill TH for any farm. The wild monster tribe will rebuild, but you have to wait 24 hours which is why we need to have as many farms as possible and also because the silos give only about half of what they used to give in map 1. Instructions on moving around in WM : When your map room hits level 2, you are automatically teleported to a random spot on the WM. There are a few ways you can move your main base in WM. 1) When another player completely wipes out your base and outposts, you are given the option to move to a random location. 2) When a friend invites you over to their outpost, you must pay 10mil of each resource to move to that location. 3) You can move your main base to one of the outposts you have captured. I am not sure about how much this will cost though…. 4) In the worst case scenario, you can recycle your map room and rebuild another one to move to another random location on the WM. NOTE : Methods 1, 2, and 4 will delete all the outposts you currently own.
Chapter 6: The Secret art of Kozu farming
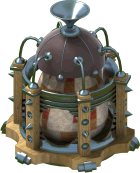
This chapter will tell you: You’re still in Map Room 1, and are low on resources. Your upgrades are all starting to get real expensive, and you need to gain resources faster, or else the third worker would be to no use. To solve this problem, your main goal is to destroy the Kozu tribes so many times, its TH (Town Hall) reaches level 6 (The level 6 TH will look like this): When reaching this point, each and every single silo of the Kozu will give a major ~750k of each resources, except from Goo, which will be halved. After having the Kozu at level 6, do not destroy him any more as he will eventually disappear if you do so too many times. If you however already have done this, and he never appears to you, then that means you would have to move on to the WM (short for World Map), by upgrading your Map Room for them to appear again. The silo’s give less resources, but at least you can now destroy the Town Hall and they will still repair. Now that you know the basic information about the Tribes, mainly Kozu, it’s time to tell how you get your Kozu tribe to level 6. First, you would want to have a champion. I would recommend starting out with either Gorgo or Drull, just because they are better at an early stage and can level the whole kozu all alone, at least up to TH level 5. As you might have read in Chapter 4, you can juice your chosen Champion later on. You should now start sending monsters to support your Champion (preferably Ichi, or if you have it, Zafreeti). You should now be able to enjoy your unlimited amount of resources! :) *Note, your tribes will repair each 6th hour on normal map, while using 24 hours on World Map. The good thing with that, is that you will be surrounded by tribes to farm, so the repair time of the Tribes will be nothing to worry about.
Farming the Kozu Fling in 30-35 Ichis together with one Zafreeti at the red circle and the Ichi’s will wipe out every defence tower in the Kozu yard in the first wave. Then just send in a looting wave of Pokey’s and/or your Champion to loot all the resources. There are some almost unguarded silo’s in the level 41 and level 37 Kozu yards which you would like to get, either first or last. The second one is protected by a single sniper, and a chain of Booby Traps to the east of the map: And the third is protected by a Tesla Tower at the south-western part of the map: Also, keep in mind that when destroying the whole Kozu, you should get about ~5 mil of everything, except Goo, which should be at ~2,5 mil. |
 s
s


This Website is not affiliated with Backyard Monsters. trademarks are the property of their respective owners. Game content and materials copyright Backyard Monsters. all right reserved.
